How Much Does It Cost to Replace an Electrical Panel? (San Francisco, 2026 Guide)
Replacing an electrical panel is one of those home upgrades where the “average price” you find online can be wildly misleading—especially in San Francisco. Two homes on the same block can end up with very different totals because panel work isn’t just swapping a metal box. It’s often a system-level safety and capacity project that touches permitting, inspections, utility coordination, grounding/bonding, code-required breaker protection, and in many SF homes, tight access and aging electrical infrastructure.
If you’re searching things like how much to replace an electrical panel, electrical panel replacement cost, how much does it cost to upgrade electrical panel, or electrical panel upgrade cost, you’re asking the right question—but the real answer depends on what exactly you’re replacing, why you’re doing it, and what your home’s service can support today.
This 2026 guide is written for San Francisco homeowners, landlords, and property managers who want clarity without scare tactics. We’ll cover:
- What “replace” vs “upgrade” means (and why it changes pricing)
- What drives costs up or down in San Francisco
- What a good quote should include (so you can compare bids fairly)
- Common scenarios (fuse box conversions, 100A→200A upgrades, underground service)
- Permits, inspections, and PG&E coordination in the real world
- Smart add-ons to consider while the work is open
- The 2026 reality of rebates/tax credits (so you don’t plan around incentives that aren’t available)
If you already know your equipment is outdated or unsafe, here’s the dedicated service page for Max Electric (we’ll reference it naturally in the article): Outdated Electrical Panel Replacement.
The big picture: realistic cost expectations in 2026 (and why SF is different)
Many national sources publish a broad range for cost to replace electrical panel across the U.S. For example, Angi reports a typical replacement range of $518–$2,187 with an average around $1,342, noting costs can reach $4,500 when you add complexity like moving the panel or increasing amperage.
That’s useful as a baseline reference—but it’s not a San Francisco quote.
Why San Francisco is usually higher than national averages
San Francisco panel jobs frequently cost more because:
- Labor is more expensive in high-cost markets and panel work is skilled, high-liability electrical work.
- Permitting/inspection workflows are strict (and absolutely worth it for safety and resale).
- Many homes are older (Victorian/Edwardian eras) with legacy wiring practices, limited service capacity, and tight working clearances.
- There’s a higher chance of service complications (overhead vs underground, meter location rules, limited wall space, stucco repairs, side-yard access issues).
- Electrification demand in 2026 is real: EV chargers, heat pumps, induction cooking, and ADUs push homeowners toward 200A service and more circuit capacity.
The “SF truth” about price ranges
In San Francisco, it’s more helpful to think in project buckets than in a single “average” number:
- Simple like-for-like replacements (same amperage, no relocation, no service change): typically the lowest-cost category locally—still often higher than national averages once permit + code-appropriate parts + labor are included.
- Panel upgrades (commonly to 200A) with service work: usually a bigger jump because it’s not only the panel; it’s often the service entrance, grounding/bonding, and utility coordination.
- Complex upgrades (relocation, underground service trenching, major corrections, multi-unit constraints): can escalate significantly.
A practical example from the Bay Area shows the spread: overhead 200A upgrades may land in the mid-thousands, while underground upgrades requiring trenching/sidewalk work can be dramatically higher.
Bottom line: The key to answering how much to replace an electrical panel is determining whether your job is a panel swap, a panel upgrade, or a service upgrade with additional site work.
Replacement vs upgrade vs service upgrade: the terms that decide your total
Homeowners often use these interchangeably, but electricians (and permitting authorities) don’t—because the scope changes the cost.
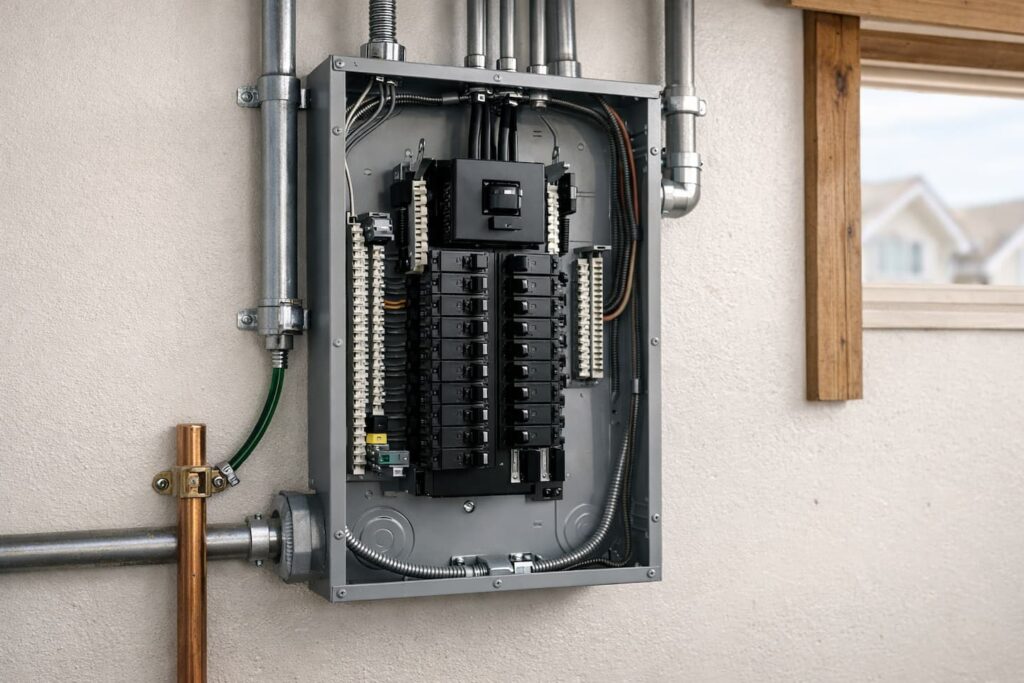
Electrical panel replacement (what it usually means)
A “replacement” typically means you’re installing a new load center (breaker panel) in place of the existing one without increasing the service size.
Common examples:
- Replacing a worn or unsafe breaker panel with a modern equivalent
- Replacing an obsolete panel to improve reliability
- Swapping a panel with physical damage, corrosion, or heat damage
In a true replacement, your home might stay at:
- 100A → 100A
- 125A → 125A
- 150A → 150A (less common, but it exists)
This is where the phrase “electric panel replacement cost” is most accurate.
Electrical panel upgrade (what people usually mean)
An “upgrade” often means one or more of the following:
- Increasing capacity (most commonly 100A → 200A)
- Adding circuit space for future loads (EV charging, heat pump, ADU)
- Replacing meter-main equipment or adding a main disconnect
- Upgrading grounding and bonding to current standards
This is where people search electrical panel upgrade cost, cost of upgrading electrical panel, and how much does it cost to upgrade electrical panel—because the goal is not just “new,” it’s “more capable and code-aligned.”
Fixr, for instance, states that upgrading to 200A service typically costs $1,800–$4,500 nationally depending on starting amperage and wiring age.
Again: that’s a national reference, not a guaranteed SF local number—but it helps you understand why upgrades cost more than simple swaps.
Service upgrade (the hidden category many homeowners don’t realize they’re in)
A “service upgrade” can include:
- New service entrance conductors (overhead drop connection point / mast / weatherhead)
- New meter socket or meter-main combo
- Changes to the service disconnect arrangement
- Adjustments that require PG&E involvement
- Potentially: trenching, conduit replacement, or utility-side infrastructure timing
This is where the biggest price swings happen.
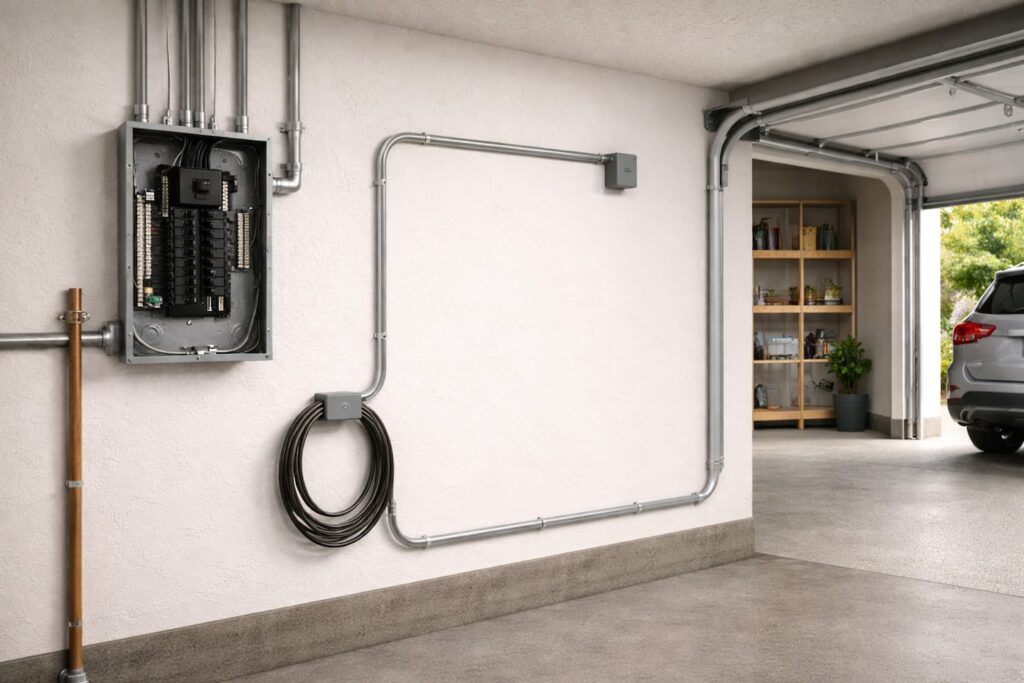
What you’re actually paying for (a real-world cost breakdown)
When you get a professional quote, you’re not buying “a box with breakers.” You’re paying for a safe, compliant electrical distribution system installation—plus the approvals that allow your home to be legally re-energized.
Below is the practical breakdown that explains most differences in cost of electrical panel replacement quotes.
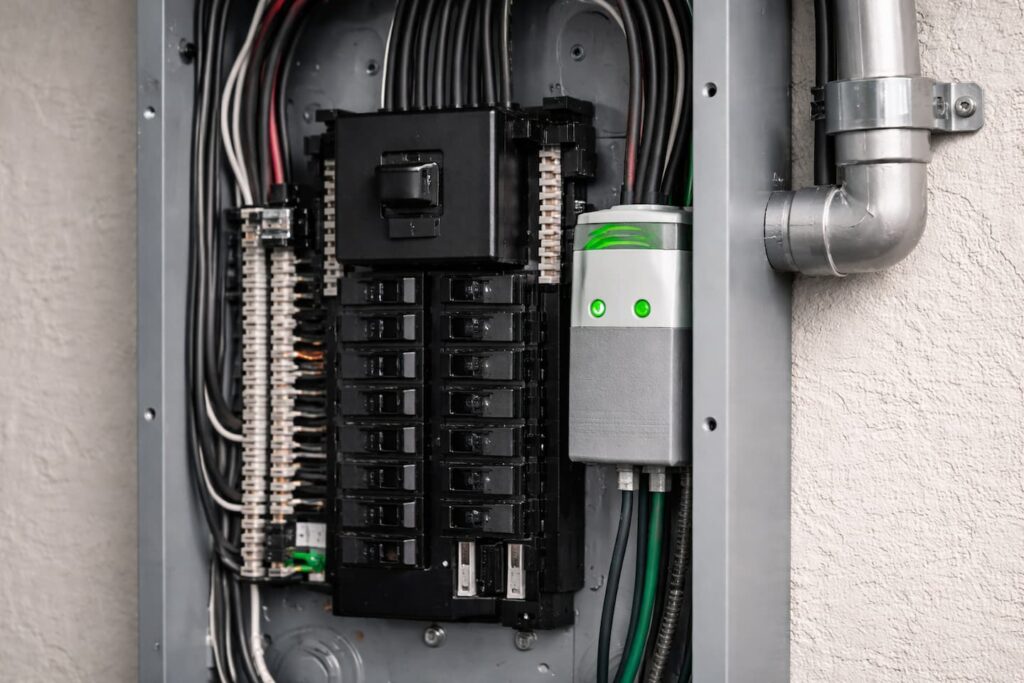
A) Equipment and materials
What may be included:
- New panel/load center (with adequate bus rating and spaces)
- Main breaker (or main lug with separate disconnect, depending on layout)
- Breakers (standard + AFCI/GFCI as required by code and scope)
- Neutral/ground bars, bonding hardware
- Conduit, fittings, connectors, bushings
- Service mast/weatherhead components (overhead service)
- Grounding electrode conductor and clamps
- Labeling and updated circuit directory
- Optional but common in 2026: whole-home surge protective device (SPD)
Important detail: Breaker type matters. AFCI/GFCI breakers are typically more expensive than standard breakers, and modern code expectations often push more circuits into AFCI/GFCI protection depending on the work scope and what’s being altered.

B) Labor (the biggest line item in most SF projects)
Panel work is time-intensive because electricians must:
- Safely de-energize and verify
- Document circuits
- Remove and remake terminations correctly
- Route, torque, and dress conductors
- Ensure grounding/bonding is correct
- Label everything cleanly
- Prepare for inspection approval
It’s also high-responsibility work: mistakes can create fire risk or repeated nuisance tripping and callbacks—so quality labor matters.
C) Permits and inspections (San Francisco DBI)
Permits are part of the cost and the process. San Francisco’s published electrical permit fee schedule includes a line item for residential general wiring: “Up to 40 outlets and/or devices, includes up to 200 Amp service upgrade” — $534 (as of the published schedule).
San Francisco also maintains a public resource page for DBI fees and links to electrical permit issuance/inspection tables.
And if your permit is issued online, SF’s portal notes an additional charge that may apply (up to a percentage of permit fees).
Why this matters: When you compare quotes, one contractor may include permit/inspection handling while another leaves it to you—or quietly excludes permit fees entirely.
D) PG&E coordination (when service changes are involved)
If your project requires utility coordination, it can affect both timeline and cost. PG&E’s published electrical panel upgrade roadmap states that after the panel has been replaced and the city inspector approves, PG&E will reconnect and energize your home—typically within one day, and that PG&E gets permits for outside infrastructure work only while the customer is responsible for permits/costs related to wiring work at the home.
PG&E also publishes its “Greenbook” utility requirements, and notes an updated refresh timing (useful because utility requirements can be versioned).
E) Construction/repair coordination (often overlooked)
Panel work can trigger wall or exterior repairs:
- Stucco patching
- Siding adjustments
- Drywall repairs
- Paint touch-ups
A quote may or may not include these. It’s not “wrong” to exclude them—but it must be clear.
The biggest cost drivers (what changes your quote by thousands)
If you want a practical way to estimate how much to replace electrical panel without guessing, focus on these drivers:
1) Amperage (100A vs 200A vs 400A)
- 100A / 125A can be enough for smaller homes with mostly gas appliances and no EV charging.
- 200A is often the “modern standard” target for SF homes planning EV charging and electrification.
- 400A is usually for large homes, multi-unit or high-load configurations, multiple EV chargers, large heat pump setups, or significant additions/ADUs.
Higher amperage doesn’t just mean a bigger breaker—it may mean changes to service conductors, meter-main equipment, and sometimes utility considerations.
2) Overhead vs underground service
- Overhead service tends to be more straightforward: mast/weatherhead and service conductors are accessible.
- Underground service can involve trenching, conduit work, concrete/sidewalk restoration, and more coordination—often a major cost multiplier.
This is one of the most common reasons SF homeowners see unexpectedly high bids.
3) Panel location, clearance, and accessibility
San Francisco homes commonly have panels:
- In narrow side yards
- Behind gates or in awkward alcoves
- In garages full of storage
- In locations that no longer meet recommended working clearance or safe access
If the panel must be moved for safety/clearance/utility arrangement reasons, relocation costs can be significant. Angi reports the average cost to move a panel ranges $1,500–$3,500 (nationally).
In SF, access constraints and exterior repair needs can push that higher.
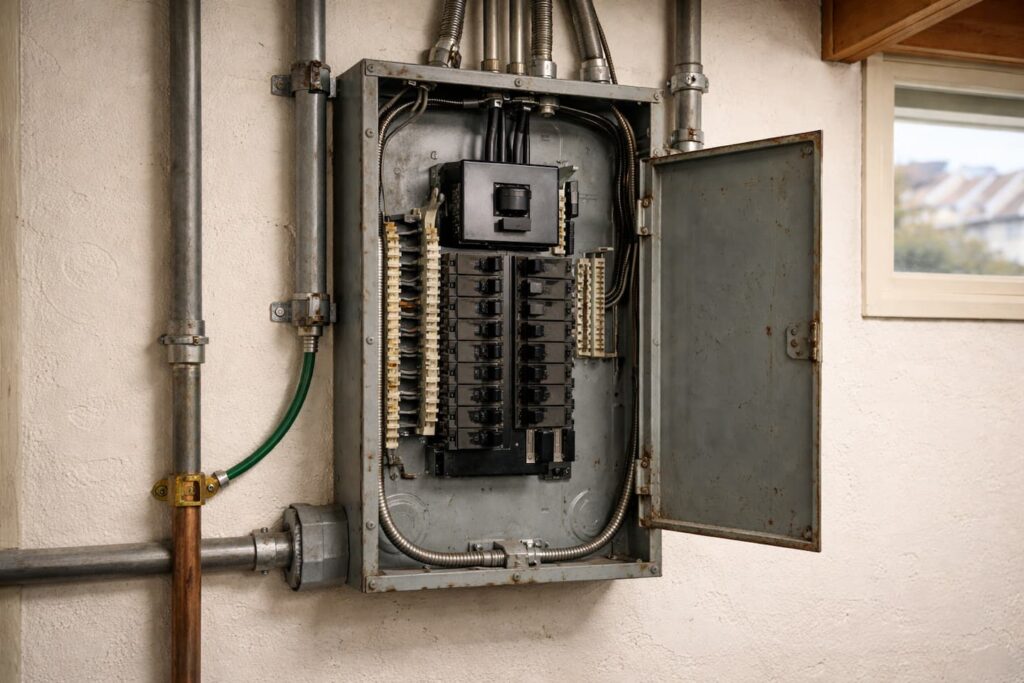
4) Condition of service equipment and wiring
A panel replacement can reveal:
- Damaged service entrance conductors
- Corroded meter sockets
- Improper neutrals/grounds
- Missing or inadequate grounding electrode systems
- Previous “creative” DIY modifications
Once discovered, these aren’t optional fixes—they’re safety fixes. And safety fixes affect cost.
5) Circuit count and breaker protection requirements
More circuits and more AFCI/GFCI protection can increase material cost and labor time. Breakers vary widely in price depending on type.
San Francisco-specific realities you should plan for
SF permitting isn’t “red tape”—it’s the safety handshake
In a high-density city with many older structures, the permit and inspection process is part of what ensures panel work is not just “working today,” but safe long-term.
San Francisco’s electrical permit fee table (the one that includes the $534 category reference) is public, and SF maintains a DBI fee resource page connecting to these schedules.
Utility processes and energization timing can affect your schedule
PG&E’s roadmap suggests reconnection is typically within one day after city approval.
However, separate studies and regulatory discussions show that energization and upgrade timelines can vary widely depending on the situation, infrastructure needs, and scheduling constraints.
Practical planning tip: If you run a home office, have medical equipment, or manage tenants, talk through outage timing and contingency plans before work begins.
The SF housing stock creates predictable panel issues
It’s common in SF to find:
- Old panels with limited spaces
- Panels installed in non-ideal locations by past remodels
- Mixed old/new wiring
- Add-on circuits without clean documentation
This is why panel projects often benefit from a contractor who’s used to SF homes specifically—not just general electrical experience.
Common project scenarios (with detailed “what’s included” explanations)
Below are the most common real-world scenarios behind electrical panel replacement cost searches. Notice how each scenario changes scope—because the scope changes your final total.
Scenario A: Like-for-like replacement (same amperage, modern service already in good shape)
Who this fits: Homes that already have adequate service capacity and just need a safer, newer panel.
Typical scope includes:
- Replace existing panel with a new panel of similar rating
- Transfer circuits neatly with correct terminations and torque
- Replace any damaged breakers or incompatible breaker types
- Update labeling and circuit directory
- Permit + inspection
- Verify grounding/bonding is correct (and fix if not)
What can increase cost here:
- A high number of circuits
- Difficult access (tight side yard, finished garage wall constraints)
- The need for AFCI/GFCI breakers on certain circuits depending on scope
- Discovery of damaged conductors or previous unsafe modifications
Scenario B: Fuse box to breaker panel conversion
Who this fits: Older homes where the system may function but lacks modern safety and capacity expectations.
Why it’s often more expensive than homeowners expect:
- Fuse systems often correlate with older service arrangements and older wiring practices.
- Grounding/bonding may be inadequate or non-standard.
- The conversion may reveal that the service capacity is too small for modern loads.
Typical scope includes:
- Remove fuse equipment
- Install modern breaker panel
- Rework circuits to proper breaker sizing and labeling
- Update grounding/bonding
- Permit + inspection
Common outcome: Many homeowners start with “replace the panel” and end up choosing “upgrade to 200A” because it’s the moment where future electrification becomes realistic.
Scenario C: 100A → 200A panel upgrade (the most common “how much to upgrade electrical panel” intent)
Who this fits: Homes adding EV charging, heat pumps, induction, ADUs, or simply outgrowing 100A capacity.
Typical scope includes:
- New 200A panel with sufficient spaces
- Service entrance conductor upgrades (often)
- Meter-main work depending on layout
- Grounding/bonding upgrades
- Permit + inspection
- PG&E coordination if required
San Francisco’s fee schedule explicitly references permit categories that may include up to a 200A service upgrade in certain residential general wiring scopes.
PG&E’s roadmap clarifies the sequence: inspector approval → PG&E reconnect/energize typically within one day.
Why costs vary so much in this scenario:
- Overhead vs underground service
- Meter location and service arrangement requirements
- Need to relocate the panel for clearance or practicality
- Whether the home needs additional circuit work beyond the panel
Scenario D: Upgrade + relocation (clearance, access, or layout conflicts)
Who this fits: Homes where the panel is in a poor location—too tight, obstructed, or conflicting with other utilities or remodel plans.
Typical scope includes:
- New panel in a new location
- New conduit paths and re-routing of feeders/branch circuits
- Wall repairs and finishing coordination
- Permit + inspection
Relocation is a known cost driver; national estimates commonly place panel moving in the low-thousands range.
In SF, exterior wall materials and access can add additional cost.
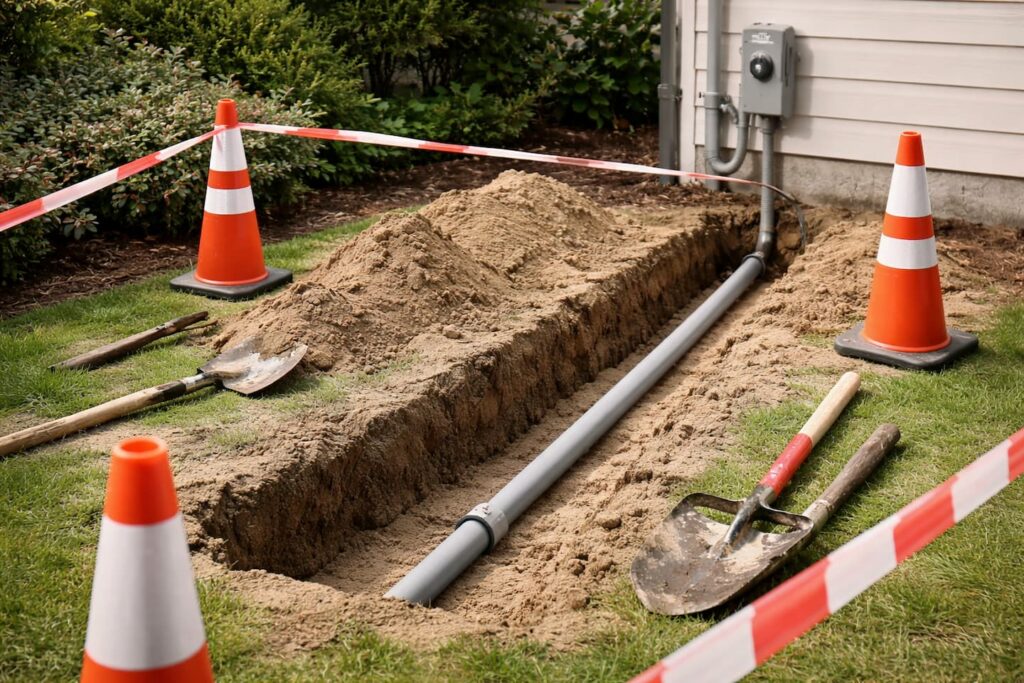
Scenario E: Underground service upgrade with trenching/repair
Who this fits: Homes with underground feeds, or homes where the path of service conductors must change.
Why it can get expensive fast:
- Trenching and conduit work
- Concrete/landscape restoration
- Possible sidewalk/driveway involvement
- Additional utility coordination and scheduling constraints
Studies of service upgrades and electrification retrofits highlight that timelines can range from very quick to many months depending on utility scheduling and permitting complexity.
“What should a quote include?” — the comparison checklist
When you’re comparing bids for cost to replace electrical panel, you want itemized clarity, not just a single number.
A strong quote typically specifies:
A) Equipment and amperage
- Amperage (100/125/200/400)
- Panel type (main breaker vs main lug + disconnect)
- Number of spaces (future capacity matters)
B) What is included in “service”
- Are service entrance conductors included?
- Is meter equipment included?
- Is grounding electrode work included?
- Are AFCI/GFCI breakers included where required?
C) Permitting and inspection handling
- Who pulls the permit?
- Who schedules inspections?
- Are DBI fees included? (SF publishes its fee schedules publicly.)
D) PG&E coordination
- Who handles the service change application if required?
- Who schedules disconnect/reconnect timing?
- What is the estimated outage plan?
PG&E’s own roadmap outlines homeowner responsibility vs utility responsibility in a way that helps you understand scope boundaries.
E) Exclusions (what’s not included)
- Stucco/drywall repair
- Painting
- Extra circuits beyond the panel swap
- EV charger installation (unless explicitly included)
Red flag: A quote that is dramatically lower than others but doesn’t mention permits, inspections, breaker types, grounding/bonding, or PG&E coordination is usually missing scope.
The step-by-step process (what actually happens on project day)
Knowing the workflow helps you understand where costs come from and how to avoid surprises.
Step 1: Site visit and load planning
A professional electrician will typically:
- Inspect the existing panel and service equipment
- Review circuit needs and space constraints
- Discuss future plans (EV charger, heat pump, ADU)
- Identify potential relocation/clearance issues
- Determine whether PG&E coordination is required
Step 2: Permitting and scheduling
In San Francisco, permits/inspection scheduling is part of the real timeline. SF publishes electrical permit fees and related schedules publicly.
Step 3: Coordination with PG&E (if needed)
If the service must be disconnected or modified in a way requiring the utility, your contractor will plan that sequence.
PG&E’s roadmap states that after the panel is replaced and the city inspector approves, PG&E reconnects and energizes the home—typically within one day.
Step 4: Power outage and safe replacement
On the day of work:
- Power is shut off safely
- Old equipment is removed
- Circuits are transferred and re-terminated
- Grounding/bonding is verified and corrected
- Panel is labeled clearly
Step 5: Inspection and re-energization
After approval, re-energization follows the agreed sequence (including PG&E steps if required).
Smart add-ons in 2026 (often cheaper during a panel job than later)
A panel project is a “high leverage” moment: you already have electrical access open, and you’re already investing in permitting and skilled labor. Certain upgrades become more cost-effective when bundled.
Whole-home surge protection (SPD)
A surge protective device at the panel can help protect:
- TVs and computers
- Smart home systems
- EV charging equipment
- Appliances with modern control boards
It’s a relatively small add-on compared to the overall panel project—often worth discussing.
EV charger readiness (even if you’re not installing the charger yet)
If you plan EV charging soon, consider:
- Reserving breaker space
- Planning conduit routes to your parking/garage
- Discussing load management strategies if your home’s total load is close to limits
Even a dedicated circuit installation can be a meaningful add-on cost—Angi estimates dedicated circuit installs often range broadly based on distance and complexity.
Subpanels for ADUs or additions
In SF, ADUs and remodels can benefit from:
- A main panel upgrade
- A properly sized subpanel
- Clean circuit segregation and labeling
This can simplify future work and reduce disruptive electrical changes later.
How to reduce cost without compromising safety
If you’re trying to manage electrical panel replacement cost in an expensive market, focus on smart planning rather than cutting corners.
1) Right-size your upgrade based on real future plans
If you’re staying mostly gas and no EV charging, a 200A upgrade may be unnecessary. But if EV + heat pump + induction is likely, upgrading once is often cheaper than upgrading twice.
2) Avoid relocation unless it’s needed
Panel relocation can add thousands; if your current location is compliant and practical, keeping it saves money.
3) Bundle the right work while the panel is open
Adding surge protection or planning EV readiness during panel work can reduce future labor mobilization costs.
4) Use a contractor who itemizes scope clearly
A clear scope reduces change orders and prevents “surprise” add-ons that weren’t discussed.
Rebates and tax credits in 2026: what’s real, what’s not
This is the section where many homeowners accidentally plan around outdated information.
Federal tax credits: verify carefully for 2026
The IRS published FAQs related to Public Law 119-21 (signed July 4, 2025), stating that the 25C Energy Efficient Home Improvement Credit is not allowed for property placed in service after December 31, 2025, and also notes other terminations/changes.
So for panel upgrades completed/placed in service in 2026, do not assume federal credits apply—confirm current eligibility with a tax professional.
California electrification rebates: availability can be capped or waitlisted
State and program reporting in early 2026 shows that certain regional budgets and reservation windows have been fully reserved, with waitlist conditions, and Northern California was expected to become fully reserved in January 2026 in some reporting.
Practical takeaway: If you’re upgrading a panel specifically to support electrification, ask about active programs right now and whether reservations are open for your region and project type.
FAQ (expanded answers for real buyer intent)
How much to replace electrical panel vs how much to upgrade electrical panel?
Replacing usually means like-for-like (same amperage). Upgrading often means increasing capacity (commonly 100A→200A) and may require service conductor and meter equipment work, plus utility coordination.
How much does it cost to replace electrical panel in 2026?
Nationally, replacement ranges reported by large datasets can be in the low-thousands (Angi cites $518–$2,187 average ~$1,342, with higher totals when moving/expanding service).
San Francisco often trends higher because of labor, access constraints, permitting, and service conditions.
Why are two quotes for the same house sometimes thousands apart?
Usually because one quote includes:
- Permit + inspection handling
- AFCI/GFCI breaker requirements
- Grounding/bonding corrections
- PG&E coordination
…and the other quote excludes or assumes those items.
Do I need a permit for panel replacement in San Francisco?
In most meaningful panel replacement/upgrade scenarios, yes—especially when service capacity changes or safety upgrades are part of the work. SF publishes electrical permit issuance/inspection fees and maintains a DBI fee resource page.
How long will the power be off?
For a straightforward job, many projects aim to complete same day. If PG&E coordination is involved, the timeline depends on inspection approval and utility scheduling. PG&E’s roadmap states reconnection is typically within one day after inspector approval.
However, broader studies show total “start-to-finish” timelines can vary widely when infrastructure and scheduling factors enter the picture.
Is upgrading to 200A “always worth it”?
Not always—but it often is if you plan:
- EV charging
- Heat pump HVAC
- Heat pump water heater
- Induction cooking
- ADU or major addition
The right answer comes from a load calculation and a future plan discussion.
When an outdated panel should be replaced (safety + reliability triggers)
Even if you’re not planning electrification, there are clear reasons to replace or upgrade:
- Breakers trip under normal use
- Flickering lights when appliances start
- Heat smell, buzzing, scorch marks, or warm breakers
- Rust/corrosion (especially in coastal fog exposure areas)
- No space for new circuits
- Known-problem legacy panel designs (common concern in older homes)
If you’re seeing these signs, a modern replacement isn’t just a “nice-to-have”—it’s often a safety decision.
For homeowners specifically dealing with old or unsafe equipment, Max Electric has a dedicated page describing the service scope and what to expect: Outdated Electrical Panel Replacement.
The best way to get an accurate price (and avoid surprise costs)
If you want a quote that stays stable, here’s the most effective approach:
- Ask for a site visit (panel work is too site-specific for phone-only quotes)
- Explain future plans (EV charger, heat pump, ADU—these change the best design)
- Request itemization (permit handling, breaker types, grounding/bonding, PG&E coordination)
- Clarify exclusions (wall repair, extra circuits, meter equipment, trenching)
- Confirm timeline assumptions (inspection + PG&E sequence)
That’s how you turn “how much does it cost to replace electrical panel” into an answer you can actually budget around.